2700 E Magnolia Dr. Gilbert AZ 85298
Phone 602 995 5311
[ Home ] [ Products ] [ Ordering ] [ Shipping ] [ About Us ] [ Contact Us ] [ Back ]
Search the Store by Description, Year, Model or
SEARCH BY STUDEBAKER PART NUMBER
M-truck & C cab Truck Vent Window Installation Help
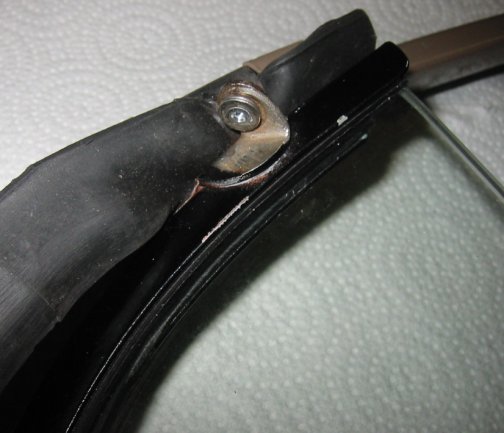
I spent a long time trying to get the vent window rubber in just right on my M5. The 2R5 one looks similar. I received a tip that Windex makes a good lubricant to slide the rubber along the frame to get it to the right place. It will later evaporate and not leave a mess. You may have to drill out the rivets for the latch and upper pivot in order to get the rubber on correctly. The M5 rubber was held in place with a rivet at each end. I think that the original rubber pieces had a washer molded into them where the rivets go through; the new ones don't have the washer so the rivet head wants to pop through the rubber. I used an oversize rivet with a larger washer under the head so that the rivet didn't pop through. I also put a washer over the rivet shaft on the under side of the window frame. To set the tubular rivets, I put a bearing ball slightly bigger than the rivet shaft diameter on the end of the tube, then squeezed the ball down a little with ViseGrip pliers until the rivet tip started to spread. Take the ball away and squeeze the rivet down tight. Of course, the ball wants to fly away, so buy a handfull of balls. It's easier with someone else to help hold things in place. I think I also had a small piece of steel down in the rivet well on the top side of the rubber to let the ViseGrips press on the rivet head without crushing the window frame. My local Ace hardware has a good selection of tubular brass rivets - buy a bunch.
Here's a picture of the under side of my window frame with the vent window, rubber, and rivets in place. Good luck!
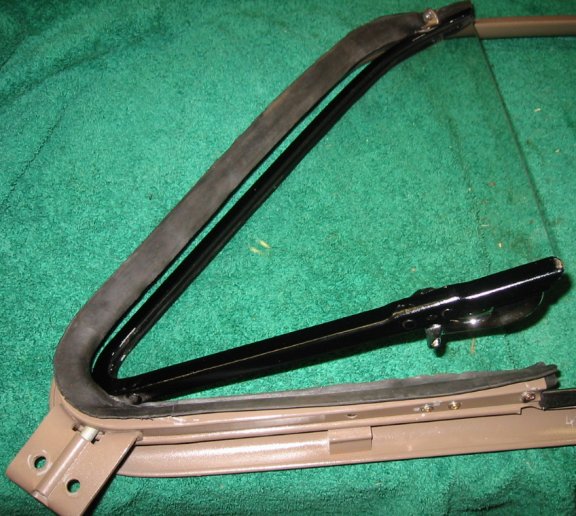
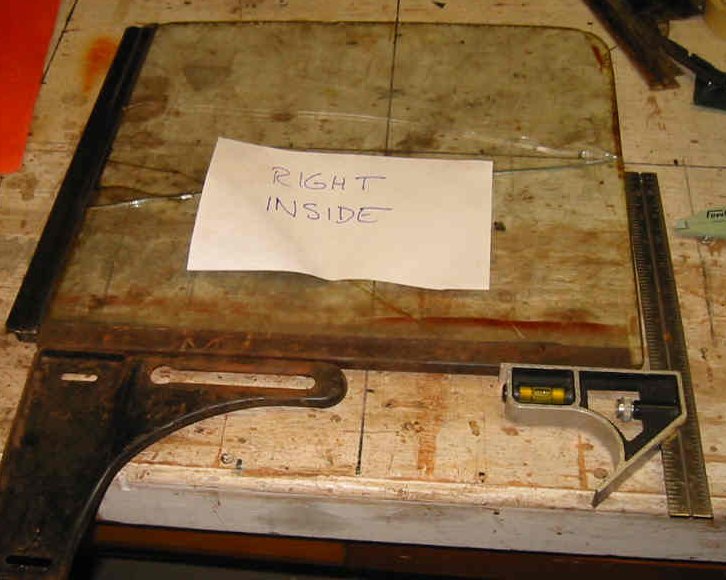
Door Glass Installation - M5 and 2R Trucks
I'm about to put in door glass myself and have been studying up. The shop manual for the 2R trucks is a lot more instructive about this (and many other things) than the M truck manual. The pictures show the bottom channel and the division channel (front trim piece) already on the glass. The door windows on the 2R and M-5 trucks look a lot alike. The trick seems to be to tilt the window forward about 45 degrees and put the lower end of the channel into the top of the door. Lower it down and rotate to put the edge of the channel in the door guide. Install the regulator arm in the lift channel and then engage the 2 window guide studs. Then you are supposed to adjust its position and install the two nuts on the guide studs.
The installation sequence is:
1. door window guide (long straight bar)2. regulator mechanism
3. glass and channel
4. lock assembly and remote control
5. door locks and remote controls
6. trim and arm rests
7. handles
8. door window weatherseals (fuzzy strips)
9. vent window assembly (manual shows shims being used to adjust vent position to match division channel)
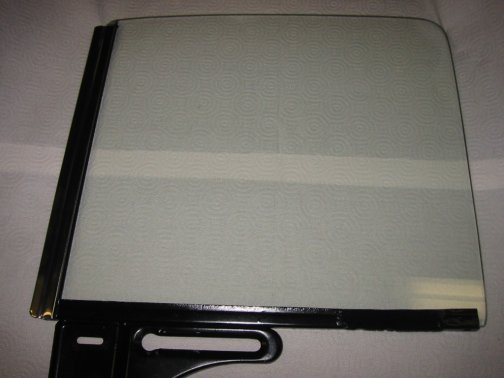
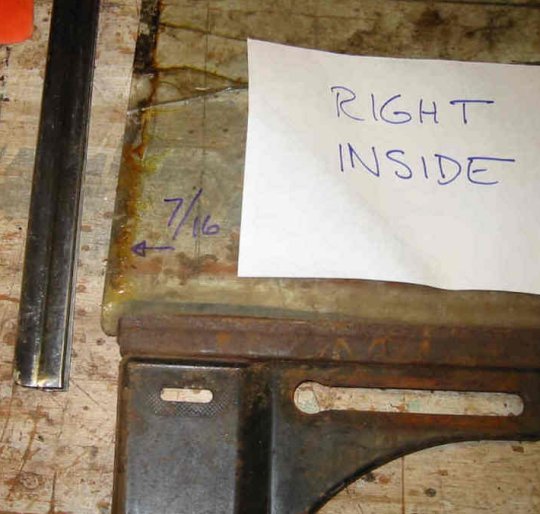
The glass is held in the channel with "glass setting tape", a blend of cork and rubber that is sticky both sides. I just bought some 1-1/2 in wide x 1/16 thick tape from www.lebaronbonney.com. They sell it for $0.65/ft. Glass supply places sell 100 ft rolls, but you only need about 3 ft per window. It has to be way easier to put the channel and trim on the glass while it's on a bench top than trying to do it through the openings in the door! I checked the position of the old glass: it seems to be centered front-to-back in the channel with about 7/16 of glass hanging out of each end. Be sure to put the new glass in with the correct orientation - looking from the "inside", the vertical edges lean a few degrees to the back of the truck.
The 2R manual has lots of good pictures and written material about engines, transmissions, axles, etc. that is helpful for the M trucks. Reproduction manuals are available
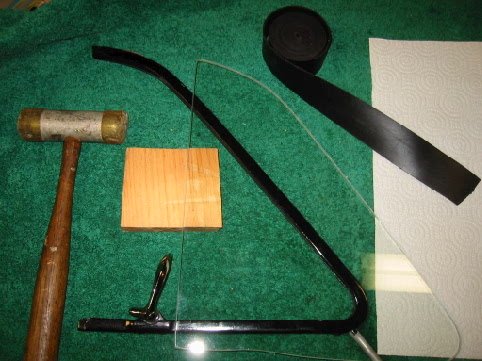
A question was posted about putting door glass in the channel. I finally got a chance to install mine. Using the 1-1/2" wide x 1/16" thick glass setting tape I got from Lebaron Bonney (www.lebaronbonney.com), I folded the tape around the edges of the glass and pushed it into the channel. The tape is some kind of almost-set rubbery adhesive, so it clings very well but also can flow a little. I actually had to use a wood block and plastic hammer to really get the channel all the way on. I put the opposite edge of the glass on a wooden bench top with a thick towel on it, placed the wood block against the channel, and tapped gently but firmly to seat it completely. Glass is very strong in compression, just don't nick it on the edges!
The tape was easy to use and really easy to clean up. I just trimmed off the excess with a razor knife. I also did the vent windows. The vent frames have to be removed from the door trim frame to work on them. They took quite a bit of hammering to get the glass seated.
Since I had to set a bunch of tubular rivets to redo the frames, I worked out a technique for doing them. I used a bearing ball just slightly larger than the rivet diameter. Stick it on the end of the rivet with Crazy Glue or putty, then put Visegrips over the ball and rivet head and squeeze until the rivet spreads a little. Then pull the ball off and use the Visegrips to tighten it up. Works slick!
It was pretty easy to assemble the glass and channels on the workbench. The door glass assembly goes into the door easily by tipping it forward 45 degrees and lowering it down. I can't imagine using liquid silicone rubber to do the job with the channel mounted in the door and getting everything lined up without making a huge mess.
Installing window U-channels by Gary Ash
We'll assume that the vent window rubber has already been installed and that the door handles and panel have been removed. For both the M and C-cab trucks, the U channel installation starts by stuffing one end loosely down the side of the door with the window 3/4 down, but don't press the channel in place yet. This is just to get the tail out of the way. The tail does have to go over the rear-facing edge of the door glass. It's probably easier to do this with the door glass removed. The front end of the channel goes at the top of the door. Push the channel end forward until it almost touches the vent window rubber but is about 1/8-1/4 inch shy of it. You can use one #4 or #6 x 3/8-1/2" sheet metal screw to hold the end of the channel in place on the top of the door instead of a rivet. Put the screw about 1/2 inch in from the end. Then press the channel up into the top of the door and around the rear corner, forming the channel as you go, then down the back edge. The #271475 clip plugs into a hole in the door edge near the bottom, then the channel is pushed into the clip when the window is mostly up. Your clip may still be in the door, though it may be rusty or broken. We have these clips for $2.00 each. You need one for each side. You may want to use some pliers to pinch the clip lightly into the channel. Check that the window goes up and down smoothly before reinstalling the door panels and handles.